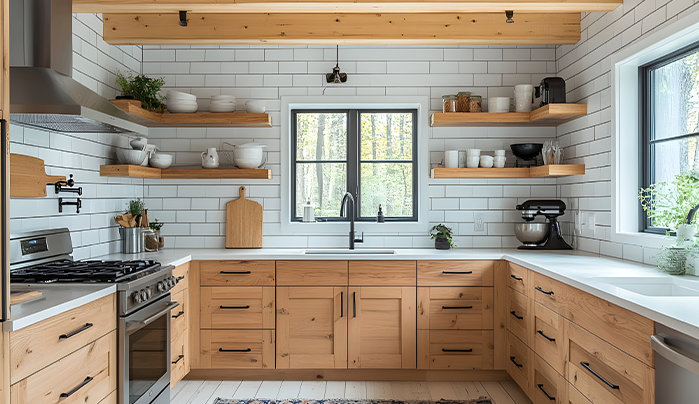
Have you been wonderstruck by the beauty of a piece of furniture? You may have wondered how flawless it is or how its wood-grain finish was formed. You are actually appreciating the veneer. This thin slice of timber looks beautiful and is also sustainable.
Let us learn how tall trees are transformed into veneers that add a sophisticated touch to your living spaces.
From Woods to Veneers: The Step-by-Step Approach Explained
Interested to learn the whole cycle of veneer creation? Here’s how it goes:
- Selecting the Perfect Tree
The making of veneer begins in a deep forest because only the finest trees are chosen for the purpose. What’s a perfect tree like? One with a straight trunk, few knots, and an attractive grain pattern. Oak, cherry, maple, walnut, and mahogany are the most used trees. After identification, special machinery is employed to cut them down so that there is little damage to the trunk.
- Preparing the Logs
After the harvesting is done, the logs are moved to veneer mills, where they are prepared for the next step. This is what happens here:
- The outer bark is stripped with rotating drums or high-pressure water jets.
- The logs are subsequently washed to clean out any dirt or debris that might hurt the cutting tools.
- Depending on their species, dimensions, and planned application, the logs are sorted.
- Further, the logs are cut into 8 to 12-foot pieces to make them more manageable.
- They are steamed and soaked in hot water. This softens the wood fibres, making them easy to cut. It also reduces the risk of the wood splitting.
- Slicing the Veneer
The softened wood is then sliced into thin sheets. Do you know that various techniques are used for this purpose? This includes:
- Rotary Cutting: The log is placed on a lathe and rotated against a sharp blade. This produces a continuous sheet and is an efficient technique commonly used for plywood production.
- Slicing: For this technique, the log is cut into halves or quarters. This is then mounted on a sliding carriage and moved against a stationary knife. This gives diverse grain patterns, such as plain, quarter, or rift cuts, ideal for decorative veneers.
- Saw Cutting: A thin circular saw is used to cut the logs into veneer sheets. Since this technique produces a lot of waste, it is not a commonly used method. However, it offers unique grain patterns and is used in thick veneers or highly figured woods.
- Drying the Veneer Sheets
Do you know that freshly cut veneer sheets have high moisture content? Dry them properly to prevent warping. Here’s how this is done:
- Initial Moisture Removal: Lay out the sheet or hang them up to allow the surface moisture to evaporate.
- Mechanical Drying: Pass the veneer through large dryers. These use heat and air circulation to reduce moisture content to around 8-12%.
- Monitoring: It is important to dry the veneer sheets. But over-drying has its drawbacks. This can make the veneers brittle. Thus, monitor them closely to maintain their moisture levels.
- Conditioning: After the veneer sheets have dried enough, place them in conditioning rooms to equalise the moisture content across them.
- Clipping, Sorting, and Grading
After the veneer sheets are dried and conditioned, they undergo further processing. This involves:
- Clipping: Cutting the large sheets into smaller, manageable sizes using guillotine-like clippers.
- Defect Removal: The veneers are checked for any defects. Any knots, splits, or imperfections are eliminated from the sheets.
- Sorting: The sheets are organised according to their colour, grain pattern, and quality.
- Grading: Based on industry standards, grades are assigned to the sheets. The factors taken into consideration? Appearance, number of defects, etc.
- Veneer Matching and Composition
When used for decorative applications, veneer sheets are matched and composed to create visually appealing patterns. Here’s how this is done:
- Book Matching: In this method, alternating sheets are flipped to mirror each other. This creates a symmetrical pattern.
- Slip Matching: Here, the sheets are laid side by side in the sequence in which they were cut. This helps in maintaining a consistent pattern.
- Diamond Matching: For this, four triangular pieces of veneer are arranged together to form a diamond pattern.
- Random Matching: Here, the sheets are assembled without regard to grain pattern. This results in a more rustic appearance.
- Joining and Stabilising
In order to create larger panels or a continuous pattern, individual veneer sheets are joined. They are aligned edge to edge and glued. Or they are slightly tapered and overlapped. Finally, to enhance their stability, a resin-impregnated paper is stuck to their back. This improves their strength and their moisture resistance.
- The Final Touch
When veneer sheets are ready, they are bonded onto plywood or MDF with the use of adhesives. Pressure is exerted to get a strong bonding as well as smooth finish. These are used to design furniture, cabinets, etc.

Wrapping Up
From the dense forests to the sophisticated interiors of our homes, the journey of transformation of veneers is something which is difficult to believe, just by their appearance. So, the next time you gaze at a beautiful piece of furniture, keep in mind the amazing journey it has undergone.

